Sunday, 27 October 2013

Muse #40

Hi there,
Well that weekend flew by! We went to a Halloween party, and conquered a few domestic chores, and did some reading. I had thought I would spend some time stamping, but ran short on time and was only able to accomplish playing along with the Muse challenge.
 
Here is a look at the gorgeous Muse, created by the ever talented and entertaining, Darnell.
Isn't it pretty? I loosely followed the layout and color scheme, and definitely wanted to include some paper tearing because it been ages since I've done that, and it's kind of fun. You never really know what you're going to get, and it's virtually always way cooler than you thought it would look.
 
Luckily I grabbed a shot from earlier today when it was still light out, before I had decided what sentiment to add. This light highlights the texture, and the colors are more true.

That's all for now.
Thanks for stopping by,
T

Supplies
PTI: rustic white and limeade ice card stock, limeade ice ink, rustic burlap impression plate
Other: orchid opulence ink (SU), everyday sayings (HA), meadow (Inkadinkadoo), satin ribbon (Michael's)

Friday, 25 October 2013

PTI October Blog Hop

Hi, if you are here, you are probably taking a tour through the October blog hop hosted by Papertrey Ink. Hope you are having a blast and finding lots of eye candy and inspiration! I plan to do a little idea shopping later myself.

This is the perfect time to gear up for Christmas, and I love to make hand made tags for all of my gifts. It's a great way to make your wrapping look "finished" by adding that little personal touch. I usually make tags that are like tiny cards so you can add names to the inside. I used my Christmas Poinsettia set and dies to make poinsettia shaped cards by scoring the cardstock and folding it in half, and making sure the die was hanging over the folded edge just a touch before running it through the Cuttlebug.  The challenge was to make a set of at least 5. I'll be needing more than that, but made 5 different colors for now (pure poppy, raspberry fizz & berry sorbet, plus pink pirouette and rich razzleberyy from SU), and will make multiples of certain colors once I know what wrapping papers I will be using. Also, these are a little sophisticated for the nieces and nephews, so I'll probably make a few "kid friendly" ones too. Winter Penguin might be fun!
I'm certain that I bought "To:" and "From:" stamps at some point (I even think I remember it being at Archiver's in Mall of  America) but can not figure out where those got to, so I scoured my stash and found the words I was looking for in an appropriate scale in my Wonderful Words: Hello set. I just needed to mask them off to isolate the "to" and the "from".
I may also decide to add glitter to some of these, but will wait to see if silver or gold will coordinate better with my wrap. I think this raspberry one is my favourite.
Enjoy the tour.
Thanks for stopping by,
T

Wednesday, 23 October 2013

FFC19

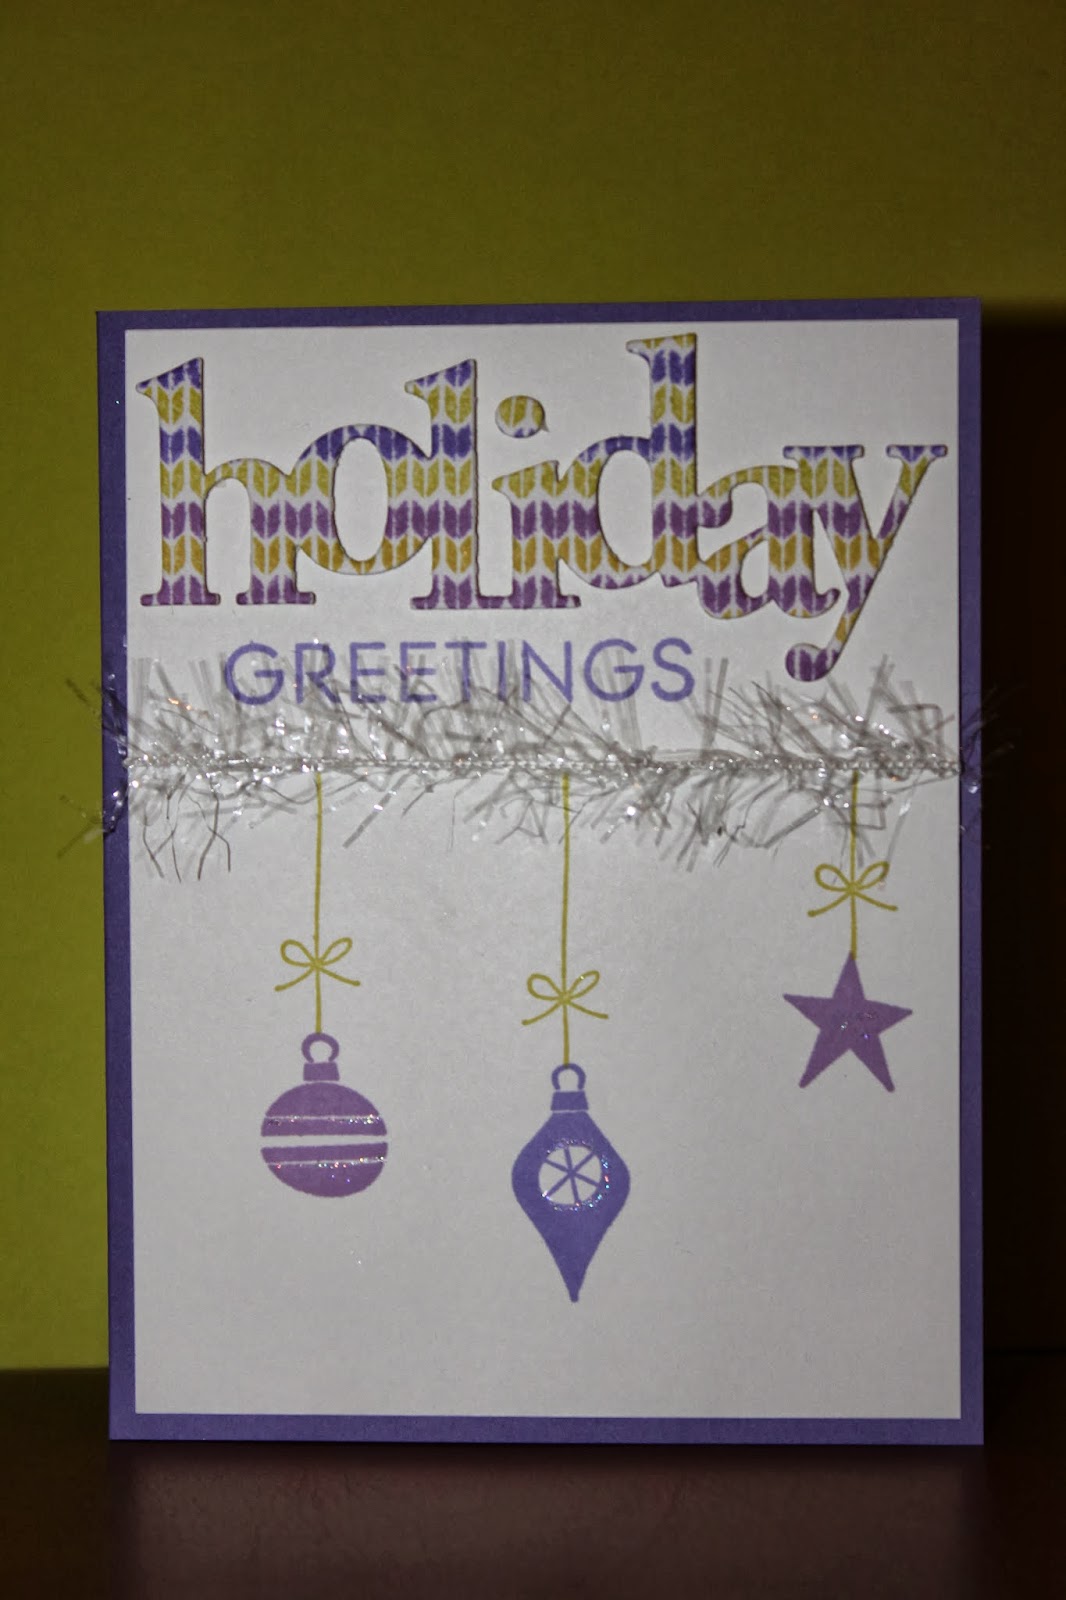
Hi, it's late, so just stopping in quickly for a Festive Friday challenge post. The theme for this week is "whimsical". I guess I'm not that whimsical, because I didn't find a whole lot in my stash that would work well with this theme! Most of my Christmas sets stuff is of the pretty variety. I found a whole lot of snowflakes, and they didn't look very whimsical. I did come across this striped sweater stamp set that I bought last year, but hadn't used yet, so I pulled it out and tried stamping some different color combinations.
 
I liked these greens and purples, and thought they would be a fun way to give the greeting some color and texture, so at the very least, I accomplished the goal of using never before used stuff (NBUS!). I added some cute miniature tinsel and "hung" some ornaments from it, and gave them a little sparkle with some 2-way glue and glitter.
 
Off to bed!
Thanks for stopping by, 
T
 
Supplies
SU: white and lovely lilac card stock, lovely lilac and orchid opulence ink, tinsel, hung up on the holidays stamps, dazzling diamonds
PTI: limeade ice ink, wonderful words: Christmas set and die
Other: 2 way-glue, Scotch foam tape

Sunday, 20 October 2013

CBC#5

I am beyond excited that I just received my first ever order from Clearly Besotted on Friday, so was able to play with some new stamps this weekend, and join in on the current challenge.  Much more enjoyable than the time I spent outside with frozen fingers trying to finish relaying paving stones before the snow flies! My hubby is still at it, but I have packed it in for today, just in time to get some day light photos.

My card didn't turn out at all the way I planned, but I'm happy with the results anyway. At first, I was drawn to the yellow and orange tones in this inspiration photo, but somehow ended up with more grey and white than anything else.

I discarded a few bits and pieces, but I did really like the way these poppies looked in coral, so kept those and built the rest of my card around them.
I'm working on another card with some of the rejected elements. I hate to waste anything! I'm not 100% finished with this one, but here's a sneak peek.
I have more leftover pieces that may or may not end up in some more cards!
 
Thanks for stopping by,
T
 
Supplies
Stamps:  remember (CB), everyday sayings (HA)
Ink: cameo coral & mellow moss (SU), smokey shadow (PTI)
Cardstock: white & smoky slate (SU), smokey shadow (PTI), scrap of vellum
Other: Nestibilities circle die, Cuttlebug embossing folder, bargain bin ribbon
 

Wednesday, 16 October 2013

MIM #136

Hi there,
With Christmas not much more than 2 months away, I thought I'd take this opportunity to make a Christmas card for this Make it Monday challenge to add texture to a solid image. I don't have many large solid images, but thought this tree would be perfect for this technique.
After inking up the tree, I lined up the center of with the edge of my stamp pad and swiped the ink outwards, following the upward slant of the branches, and repeated on the other side. I chose an SU pad because I needed something with a long straight edge.

I wanted the textured tree to be the focus of the project, so I kept the rest pretty simple and monochromatic - white on white with some soft stone snowflakes, and a soft stone card base. All that was needed to finish it off was a sentiment in grey, and some glitter for a little sparkle.
I used a 2-way glue pen to add some Dazzling Diamonds to the center of each snowflake, and Dazzling Details glitter glue for the edge of the snowdrift and to the tips of the tree branches.
Thanks for stopping by,
T
 
Supplies
PTI: white and soft stone card stock, soft stone ink, in the meadow stamp and dies, winter penguin snowflake, holiday lights sentiment
SU: wild wasabi and smoky slate ink, dazzling diamonds and dazzling details glitter
Other: snowflake cluster (unknown source), Scotch foam tape

Sunday, 13 October 2013

Muse #38

Hi, Happy Turkey Day! Yes, it's Canadian Thanksgiving this weekend, and I am full of turkey and pie. Luckily, I was able to squeeze in a bit of time to play along with the Muse challenge this week. I was really drawn to the bouquet of flowers Therese created with patterned paper, so decided to focus on that feature on my card. They are soooo pretty. Take a look.

I dug through my paper stash to find some coordinating papers in small patterns, and came up with this retired DSP pack from SU called Sunny Garden that I thought would work well.
Actually, I ended up going to town with the patterned paper and making every element out of it, aside from some the white panel, and a bit of green cardstock to hand cut some leaves.

Somehow, I ended up with a very symmetrical card, which is not my usual style, but variety is the spice of life, right?

Thanks for stopping by,
T

Supplies
SU: white and pear cardstock, sunny garden DSP, morning meadow sentiment, calypso coral ink, celery grosgrain, flower punch
PTI: mega gracious vases die, wrought iron impression plate
Other: Recollections adhesive pearls

Thursday, 10 October 2013

MIM135

Hi! This week's Make it Monday challenge at PTI is an interesting technique, a layered emboss resist. I started with polka dot Chocolate Remix designer paper and layered the Faded Text Background from Stampabilities over top in Lavender Moon ink. Next, I embossed Turning a New Leaf in clear, then sponged over the panel with Limeade Ice and Simply Chartreuse ink to make the leaves pop. I didn't want to cover up too much of the panel, so I simply matted it with SU Perfect Plum cardstock and embellished it with a plum button and Vintage Cream satin ribbon and button twine. The last step was to add a "thanks" sentiment cut with a Memory Box die. Pretty simple, but this card has a lot of depth thanks to the layering, and would work well for a male or female, though my husband would say the purple is "girly"!

Thanks for stopping by,
T

*Note: All supplies from PTI unless otherwise stated.

Wednesday, 9 October 2013

FFC18

Welcome to another Festive Friday post. It was a beautiful day outside, and it's hard to imagine Christmas is only 2 months away, but I'm happy that I'm staying on track with my pre-Christmas prep. If I hadn't been participating in this challenge all year, I'd likely be struggling at this point in the year to kick start the Christmas crafting.

For whatever reason, this tree is not very photogenic! You'll have to take my word for it when it say it is much cuter in person. Anyway, the challenge was to make a holiday project with a star element, so I broke out the glitter paper and a star punch to make sure it was the "star" of the show.
The snowflake background is embossed in white, and the sentiment is embossed in silver on a strip of vellum. A couple of thin strips of glitter paper finish it off.
That's all for today.
Thanks for stopping by,
T
 
Supplies
SU: baja breeze cardstock, wintergreen dsp, star punch
PTI: in the meadow tree die, winter penguin snowflake, think big faves sentiment
Other: Michael's glitter paper, Versamark ink, Stampendous white and silver detail embossing powder, unknown snowflake trio

Friday, 4 October 2013

Muse #37

Hi there! Happy Friday and welcome to another Muse challenge post. I'm always happy when Friday rolls around because it means more time to spend playing in the craft room. Really, what it will mean this evening is spending a bunch of time cleaning up the craft room if I hope to accomplish anything in here this weekend! Why, why, why do I let everything pile up until it's like an archaeological dig? The answer, of course, is that I always end up working on something 'til midnight, then I have to quit and climb into bed if I ever hope to get to work in the morning, so weekends are for catch up, in more ways than one. Such is life!

Onto the project at hand. When I looked at the inspiring card created by Cindy,  I thought the soft, pretty look and color scheme would be really well suited to a wedding card, though I didn't end up adding a sentiment to my card either. I incorporated a script background, dry embossing and a flower element, though all a little different than hers. Those differences combined with the die cut shape and mat give the card a very different look, though it's very easy to see the inspiration behind each element came directly from her card. I added some sheer gold ribbon which picks up on the color of the script background and blends in nicely so it doesn't steal too much attention from the focal point, which is kind of soft and subtle.

Here's a look at the card that set this project in motion:

Thanks for stopping by,
T

Supplies
SU: love & sympathy stamp, whisper white cardstock, mellow moss and almost amethyst markers, pattern 1 texture plate
PTI: mat stack 5 and layerz dies, fine linen ink, wisteria cardstock
other: Stampabilities faded text background stamp, bargain bin ribbon

Tuesday, 1 October 2013

LIM139


Happy Tuesday! Just popping in with a quick post for a challenge at Less is More, based on this sketch:
I'm desperately low on baby cards, and this simple sketch seemed well suited to a baby card, and a perfect fit for this Two By Two stamp from SU that I had yet to use. I was nice to finally dust it off and put it to use. I had to dust off my watercolor wonder crayons as well! Actually, all of the supplies I used for this card were from SU with the exception of the PTI kraft cardstock. I handmade the banner and used the sentiment, which I had masked off when I stamped the rest of the image on the white card base.
 
That's it for today!
Thanks for stopping by,
T